Interested in programming in the ColdFusion language?
Setting up a ColdFusion development environment on your local computer is easy! Just follow these simple steps. This small walkthrough will enable you to develop and execute ColdFusion web applications on your Windows PC. This software is not intended for commercial use — for that, you’ll need a licensed copy.
1. Download ColdFusion Developer Edition (for free!)
You may need to sign into your Adobe.com account (or create one if you haven’t got one yet) in order to download the Developer Edition of the ColdFusion server.
Download ColdFusion Developer Edition from Adobe.com.
2. Installation Options
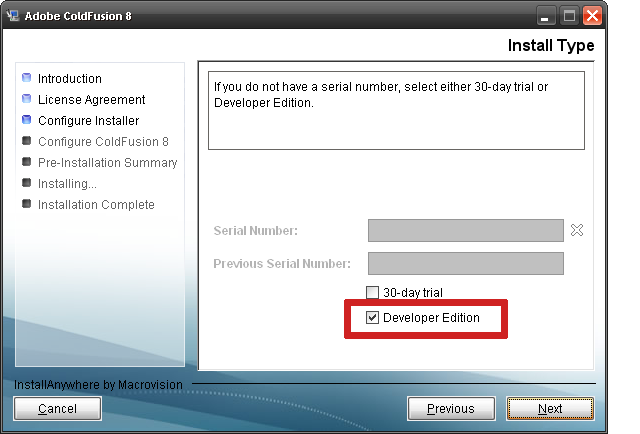
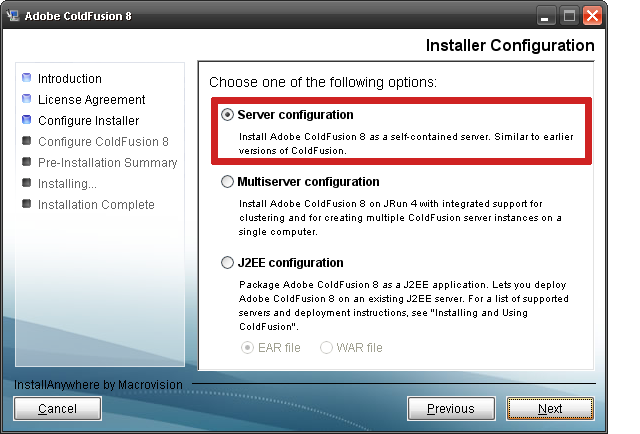
After downloading the software, begin installation. For all installation screens you should select all default options except in the screens shown in the images below. These settings will allow you to have the ColdFusion app server run on your computer locally.
Screen 1: Skip Product Key by selecting “Developer Edition”
Screen 2: Select “Server configuration”
Step 3:Select “Built-in web server” (This one is really important!)
3. Finish Installation
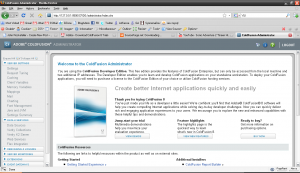
Once ColdFusion is finished, it will launch the completion script in your web browser and finish the installation. After that is complete, you will be taken to the ColdFusion Administrator screen, which will allow you to change all of your ColdFusion server settings and looks like this:
In the future you may need to change ColdFusion settings on your computer. This is the panel you will use to make those changes.
If you installed ColdFusion correctly, clicking here will take you to your ColdFusion Administrator.
Happy programming!


